Wednesday, December 1, 2010

Brew Blog - Building A Wert Chiller

Hey Beer Heads! It’s finally here! That’s right; it’s my instructions for building your own wort chiller.

Here is the list of parts you will need.
- 20 feet roll of 3/8 O.D. copper tubing
- (2) 3/8 O.D. to 1/2 female pipe (FIP, or NPT, or NPTF) brass flare fittings with nuts
- (
2) 1/2 male pipe to 3/4 female garden hose brass fittings
- About 4 inches worth of thread seal tape
Note: I chose flare fittings, but compression fittings work too. I just don’t like compression fittings.


Step 1
Straighten out the end of the copper tubing so that there is a straight segment that is long enough to reach to the bottom of your brew pot with about six inches sticking up above the rim of the pot.

Step 2

Using some tube bending “pliers”, or a tube bending spring, make a 90 degree bend in the tube. Then, from that 90 degree bend, use a tube bending spring to wrap the tube around an empty paint can to create 5-7 coils.


Step 3
Next, bend the tube up parallel to the straight section from step 1. Then, using a book to space the coil off the bottom of the brew pot, bend the remaining tube over the side of the brew pot, and do the same with the first end so that you have to “spouts” coming out the side.


Step 4
Cut off any ends that are damaged or too long. Do this to both sides.


Step 5
Put the flare fitting nut on the “spout” as shown. Do this to both sides.


Step 6
Using a tube flaring clamp, put the end of the tube flush with the side of the clamp.


Step 7
Using a tube end flaring tool, slowly clamp the tip of the cone shaped die into the hollow opening of the tube until the cone is centered on the tube. Then crank down on the tool to flare the end of the tube. Clamp and flare both sides.


Step 8
Wrap the thread seal tape around the pipe threads of the hose adapter.


Step 9
Tighten the hose adapter into the flare fitting.


Step 10
Tighten the hose adapter/flare fitting assembly onto the tube with the captive nut on the end of the “spout”. Seal tape and assemble the second set of fittings for the other side.


And that beer heads will give you a fully functioning wort chiller that will be water tight enough to even use indoors.

Sunday, November 28, 2010

The Bew Blog - Yet Another Set Back

Well Beer Heads, I had totally expected to get the tube/pipe fittings to finish my homemade wert chiller in the extra time I had over this 4 day weekend. Unfortunately, there was an unexpected event that put the halt on that plan.

Here's what happened. I just happened to be about 5 feet from my front door when I saw a silhouette on the etched glass window in the door. Since I was expecting my niece at any moment, I jerked the front door open and jumped out to try to scare her. Instead of Seeing my niece, I saw the UPS guy getting back into his truck, and I also caught out of the corner of my eye a dark figure running around the side of my house. I search the porch. No box. Since my McMaster Carr deliveries don't usually need a signature, and this wasn't anything special, I am pretty sure the UPS guy left the box on the porch. From my vantage point, it looks like somebody actually has the balls big enough to steal a box from a porch before the UPS guy can even get back in his truck! Dang! Talk about balls the size of church bells!

So now I got 2 problems. No time till Christmas holiday to finish the wert chiller, and no way to get parts from McMaster Carr in the future. This sucks, cause I really like getting things shipped to me as opposed to messing around with the half stocked shelves at my local big box home improvement stores.

Stayed tuned a little longer. Now for another word from our sponsors.


Friday, November 5, 2010

The Brew Blog - This and That

Hey Beer Heads! I can't believe I haven't posted my first beer brewing notes yet. I have been swamped at home with stuff that always seems more important. I also got the idea to make my own wort chiller to help with that first brewing which has delayed things a bit. The wort chiller is fun and easy to build. I will show you that and more after this word from our sponsors.


Saturday, August 28, 2010

The Brew Blog


I have decided to teach myself how to brew beer. I have no idea how this is going to work. All I know is that I got a crap load of stuff that I don't know how to use. I have to admit, this beer brewing kit I got is very intimidating, what with its hydrometer, racking cane, carboy and such. That's not even the scary part though. There are like a gazzilion options when it comes to beer brewing that range from water ph to ingredient brands and quantities. So, I figure, that I can use this blog as a record of what I have done so I can keep track of what I am doing. I mean hey, it worked for the Beer Odyssey, and The Tear Jerk Journal. It should work for this too.
So, tune in next time Beer Heads to find out how my first attempts at beer brewing turn out.

Friday, August 6, 2010

Hey folks! Sorry I haven't been on for awhile. I have been both too busy and too uninspired to write anything. Hopefully I can make it up to by posting a trailer load of pics from the big Midwest Tearjerkers, Hoosier Chapter Summer Gathering from Whitewater Memorial State Park near Liberty Indiana.

This couple had a teardrop made by a friend of theirs who makes truck caps for living.


Here's a Wazat brand teardrop. I had never heard of this brand before now.


This good ol' boy made one look like a barn. It's the most recognizable there. Everyone knew who he was when he pulled up.


This guy made a tiny travel trailer from a cargo trailer. I like the boat theme. I think he calls it The Dive Shack.


This is easily my favorite one. I like the unstained wood, and he paid meticulous attention to detail.


We made friends with this older couple with this larger teardrop that probably had the largest galley of any we saw. Iron Chef will probably want me to make our next one have this size of Galley.


This a factory built teardrop that is made to look like the 1940's era teardrops.


The guy who organized this camp out made this 1940's era teardrop.


This is a very interesting wood one named The Touring Lodge. Iron Chef liked the punched tin roof look in the galley. The deer antler handles were a nice touch.


This is the award winner for the smallest teardrop. They pull it with a Gold Wing motorcycle.


This southwestern themed teardrop has a stucco like finish on the exterior.


The way this guy rounded the front of his gave a lot more interior space.


And of course our teardrop camper was also there.


Even Super Dave Osborne was there...I think.


Well readers, if I have any left. That's all I got for now.

Tuesday, July 13, 2010

Hey Kids! Check out my other blog "The Weekly Squeak"


Thursday, July 8, 2010

The Weekly Squeaker is Squeaking Again


Hey folks! Check out the new posting on the formerly defunct Weekly Squeak Blog.

Saturday, May 22, 2010

The Tear Jerk Journal - The Adventure Is Just Beginning

The day finally came when we could pull the teardrop out of the garage. I was a little nervous hitching it up for the first time.


I was even more nervous about pulling out of the driveway. The thing had never been out of the garage before, so we had no idea what to expect. It could hit the curb at the end of the driveway and all the pieces could topple over. Anything could happen at that point.


Thankfully, it turned out to be road worthy. I will keep you all posted on the adventures we have this summer.


Bye, we'll see you when we return.

Tuesday, May 11, 2010

The Tear Jerk Journal - THE NEW PHONE BOOKS ARE HERE! THE NEW PHONE BOOKS ARE HERE!

...or at least the new Teardrop Building Plans are.

Apparently I am a simpleton when it comes to posting documents on the internet. I had originally planned on posting pdf files to the side bar of this blog, but the add-on I was going to use turned out to be totally useless. So I ended up just uploading them in jpeg form to the picasa account connected to this blog.

So check them out by clicking on the link in the the side bar, or if you are really serious about building a teardrop camper, then shoot me an e-mail and I will send you the original pdf files that can be easily printed
.

Saturday, April 3, 2010

The Tear Jerk Journal - This Is Dope!

So I get this wood filler from the same people that make Elmer's Glue because it says it's "stainable". I figure I can putty over the screw heads in the roof with it and then match up the color so that the screw heads don't stand out like a sore thumb.


Apparently those Elmer's people are FILTHY LIARS!


Oh well, what's another set back in THIS project? This definitely isn't the worst thing I have come across in advertising. Besides, I wasn't that positive about making our Good Friday deadline anyways.

Saturday, March 20, 2010

The Tear Jerk Journal - This and That

.
Hey Kids! I know it’s been a long time since I rapped at ya, but my computer died, and I was surprised to find out that my replacement from Dell was going to take 6 weeks to get here. Good grief dude! 6 weeks! So, basically I am forced to use the wife’s laptop since I don’t really have the time to wait before this next blog post.

“We gotta long way to go, and a short time to get there” – Jerry Reed

I looked at the calendar yesterday and realized that time is quickly running out. We only got 2 more weekends until the self-imposed deadline of April 2nd. So, if we are going to have the teardrop done in time for the first camping trip, we are going to have to get crack-a-lackin’.

Let me bring everybody up to speed. Since I last posted here, we put a counter top on the footboard wall, put in the studs that make up the wall between the galley and cabin where we plan to put all the electrical wiring, and we put the entire roof consisting of 1/8 inch panel inside and 3/8 inch “wacky board” outside with all the foam insulation between those 2 layers. We also got the hatch door built and ready to hang on the back. Now all we gotta do is put wood filler over the screw heads on the roof, then sand, stain, and urethane the entire camper before we can get started hanging the doors and attaching the trim.


Building a Better Mouse Trap…err…Teardrop Camper

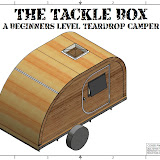
A few months ago I got fed up with all the mistakes and half ass stuff from the teardrop building instructions we got from the internet and I decided to scrap those plans and go with my own. That was clearly the best decision I made during this entire project. Luckily, I figured this out in time before the whole project was scrap. Unfortunately, there was a lot of additional effort and wasted time as a result of this company’s apparent ploy to sabotage any home builder’s project as a way to acquire more sales of their finished campers. As a service to every homebuilder out there that is thinking of getting plans from a company whose primary business is selling campers, I am going to provide a free set of my beginner level plans here at this site in hopes that people will get these instead of buying the worthless ones. These will, hands down, be the best teardrop building plans anyone has ever seen.

Monday, January 18, 2010

The Tear Jerk Journal - Excuses

Hey kids! I'm back! And working on the Teardrop as well.

Well anyways, we would be farther along in this project except it's been an unusually cold winter for Cincinnati. And as it turns out, the polyurethane coating goes 'all whack' when it has to dry in colder temperatures. So, the best we can do is continue on without staining things, and then just stain everything all at once this spring when it warms up again.

So anyways, we going to get back to work, but we decided on having the family to our house for Thanksgiving. In all the preparations for that, we ended up neglecting the teardrop. And then Christmas season came around again. We were so busy with all the usually stuff at Christmas, that the teardrop sat there through the whole month of December.

So then we figured we'd get back to work after the start of the new year, but then were distracted with a small snowstorm.

Well, finally we got back working on it last weekend, and we able to get the main components assembled.

Get the RSS Reader

Subscribe to this blog by e-mail

Enter your email address:

Delivered by FeedBurner

Add this blog to your homepage

Add to Google Reader or Homepage